Published July 2021 Version 0.1
Contents
1. User Interface
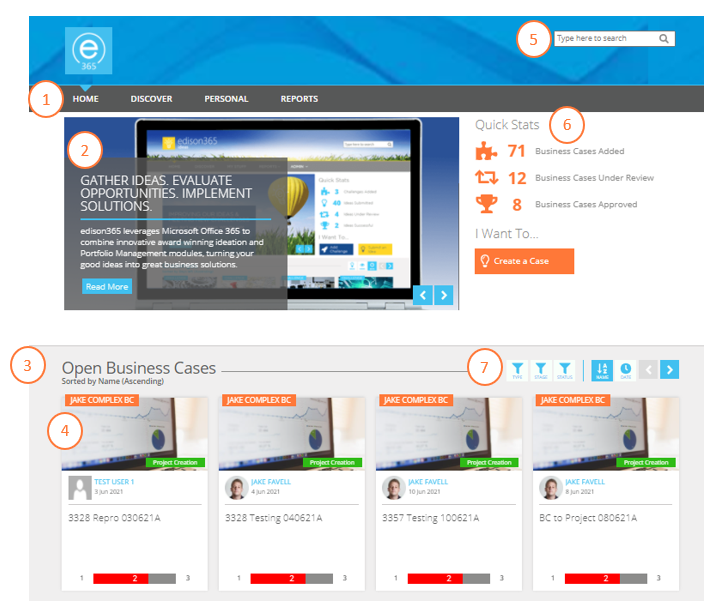
Home Page
| No. | Item | Description |
| 1 | Menu Options | Use these buttons to navigate around the module. This navigation bar is available across all pages. |
| 2 | News | All the latest news from your company is displayed here. Use the scrolling buttons to view the other News items |
| 3 | Carousels | This will display the Business Case cards for the relevant stage of the case. The Carousels include: Open Business Cases, Cases Under Review, Approved Business Case, Cancelled Business Cases, and Draft Business Cases |
| 4 | Business Case Cards | The Business Case card is a visual summary of each Business Case. Clicking on a card will open the item in full |
| 5 | Search Bar | You can search for an Business Case using criteria such as name and description. This is featured across all pages |
| 6 | Quick Stats |
The Quick Stats shows the current numbers for:
|
| 7 | Filter/Search | Use these buttons to apply a filter for the carousel or sort the results. |
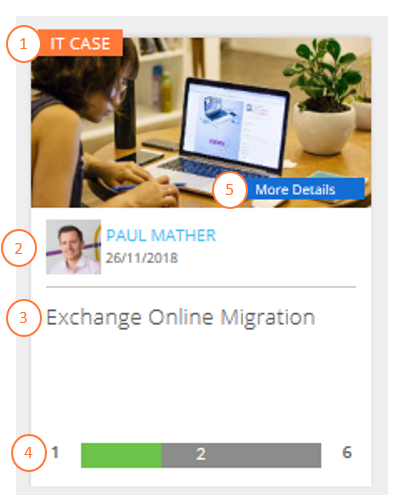
Business Case Cards
| No. | Item | Description |
| 1. | Business Case Type |
This shows the selected Business Case Type for the Business Case. |
| 2. | User/Date of Case Creation |
This is the user who created the Business Case and the date it was created. |
| 3. | Business Case Name | The name entered on the Title field. |
| 4. | Progress Bar |
This bar represents the stage of the Business Case. The numbers either end show the start and end stages for the Business Case. The number in the grey bar is the current stage. The colour of the bar shows the status of the Business Case. If the bar is green the Business Case is on track. If it is red it is late and needs actioning. |
| 5. | Current Stage |
This shows thee current stage of the Business Case |
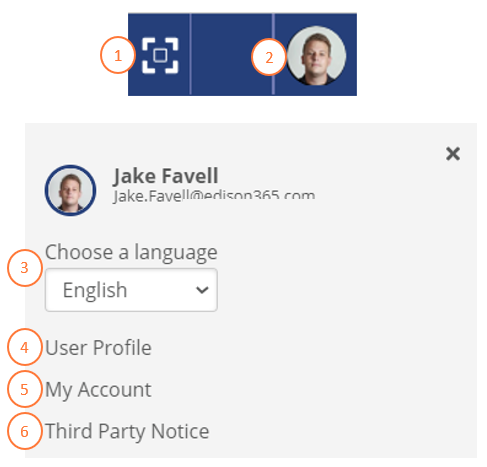
Suite Banner
| No. | Item | Description |
| 1. | Focus on Content |
Clicking on this will remove the banner image and only display the data on the specific screen. Clicking on the button again will re-add the banner image |
| 2. | Profile Settings |
Clicking here will provide additional options for the module. See additional options and their information below. |
| 3. |
Language Selection |
Clicking this will display a list of Languages you can view the module in. Once a language is selected the module will be displayed in the selected language. |
| 4. | User Profile |
Clicking this will take you to your Delve profile |
| 5. | My Account |
Clicking this will take you to your Office 365 profile |
| 6. | Third Party Notice |
This will display the third party packages we use to support our products |
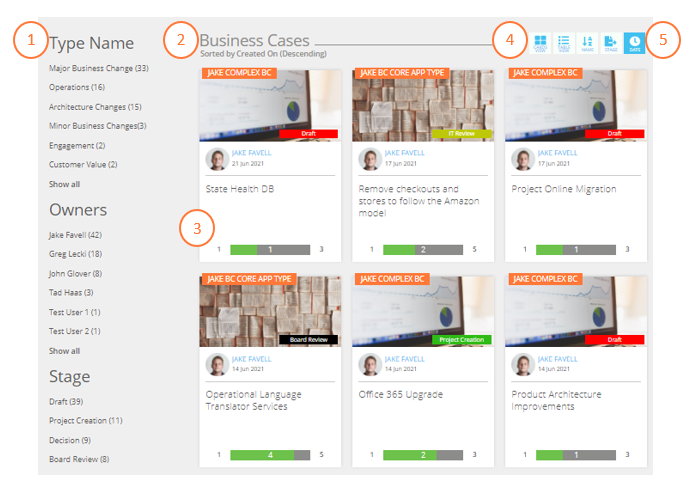
Discover Page
| No. | Item | Description |
| 1. | Filters |
The results of the Discover page can be filtered based on Type Name, Owners, Stage, and Created Date. Once a filter is applied the results in the Discover page will change to only show the Business Cases for the matching filter(s) applied. |
| 2. | Business Case Results |
All the Business Cases that can be viewed based on permission levels and roles will be displayed here. Once the filters are selected the results will change accordingly. |
| 3. | Business Case Cards | The Business Case card is a visual summary of each Business Case. Clicking on a card will open the item in full |
| 4. | Results View |
Click this to switch between viewing the business cases as a data grid in a table or in a visual grid displaying the cards. |
| 5. | Sorting Options |
Clicking the sorting buttons will sort the results of the Discover page. You can sort the data by Name, Stage and Date. |
Personal Page

| No. | Item | Description |
| 1. | User Profile |
Summary of the current user logged in. |
|
2 |
Personal Tabs |
Clicking on these will show the data for the selected tab. Business Cases shows the Business Cases you are an assigned owner of. Managed Cases shows the Business Cases you are the assigned manager of. Case Reviews shows the Business Cases you are assigned to as a reviewer. The Business Cases displayed on each tab will be broken down in tabs similar to the Home page. The tabs will only appear if you are assigned as that role on at least one Business Case |
| 3. | Business Case Cards |
Any Business Cases in the carousels are displayed here. |
| 4. | Quick Stats |
This displays the count of business cases owned, managed, reviewed, and the business cases you need to review. |
| 5. | Filter/Sorting options | Use these buttons to apply a filter for the carousel or sort the results. |
Business Case Form
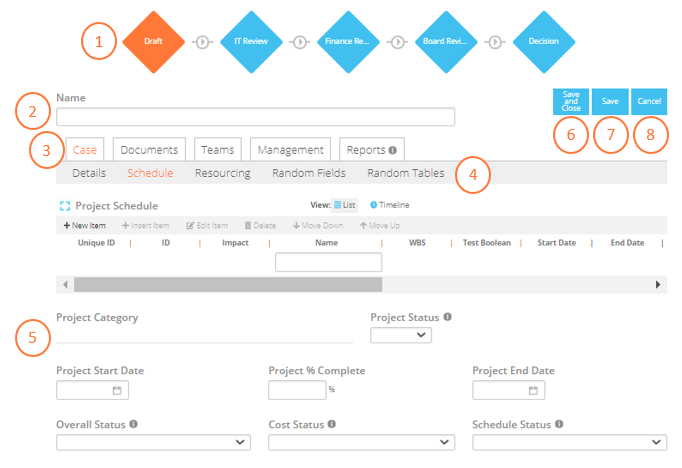
| No. | Item | Description |
| 1. | Case Stage Bar |
This bar represents the process of the Business Case. The orange section shows the current stage. Any stages with a diamond shape indicates it is an Under Review stage. If it is a square shape this indicates it is an Open stage. |
| 2. | Name | Enter the desired name of the Business Case. |
| 3. | Management Tabs |
These tabs show different sections of the case. Clicking each tab will display a new page. These are broken down by Case, Documents, Teams, Discuss, Management, and Reports. Teams, Discuss, and Reports will only be displayed if they are configured by your Administration Team. |
| 4. | Form Tabs | Clicking a tab will display the fields for that tab. The current tab selected has it's name in Orange. |
| 5. | Case Form | All of the fields, tables, or buttons on a form are displayed here. Rules can be applied to a field or table: Required (marked with a red asterisk), Read Only (field entry highlighted in Grey), and Visible (Field or table will not be displayed on the form) |
| 6. | Save and Close button | Clicking this will save the Business Case in its current state and set the Case in a read format. |
| 7. | Save button | Clicking this will save the Case in its current state but leave the case in edit mode. |
| 8. | Cancel button | Clicking this will revert the case to its previous version and return you to the Home pahe |
Tables

| No. | Item | Description |
| 1. | Table Name | Given Name for the table |
| 2. | Full Screen | Clicking this will open the table in full screen mode and will only display the table. |
| 3. | View Modes |
Clicking this will change the view of a table. Each table type has different options. |
| 4. | Command Bar |
When a Business Case is in edit mode all tables (excluding aggregate tables) will include a command bar to improve editing capability of the item, if multiple changes are required. If a table is blank only the New Item function can be used. Only one row can be selected at a time. |
| 5. | Table Data | Any data for the table is displayed here. |
2. Case Submission
Case Owners and Administrators Only
When assigned to a business case type as an owner you will have the ability to create a business case. From the Home page if you click on the Create a case button.


If you are assigned to a single business case type the form for that type will open automatically. If you are assigned to multiple business case types a list of assigned Types is displayed when clicking on the Create a Case button. Once selected the form for the chosen type will be displayed. Please refer to the Forms UI
Once opened complete the form and choose one of the following options:
Save – Saves the current state of the business case and remains open for further changes.
Save and Close – Saves the current state of the business case and returns to view mode.
Cancel – The business case will not be created and any data for the case entered will not be saved.
Once saved the Submit button will be added to the form and when clicked will be sent to the managers of the type to progress. If not clicked the case will remain as a Draft business case.
3. Case Management
Field and Table Descriptions
When a field or table are created or edited a Description can be added. This will be added by your Administrator User(s).

If a Description is added an 'i' icon will be added next to the field. Click on the icon to display the Description.
Editing a Business Case
For Owners, Process Managers, and Reviewers (if the stage supports)
At times all of the data required to complete the business case will not be available when first created so you will need to edit the Business Case.
Edit the business case to add the additional data or make any other changes. Such as assigning users, attaching or removing documents for the business case. To do this open the relevant business case and click on the Edit button.
This will open the business case in Edit mode and changes can now be made to the form and any other sections of the case where it is allowed depending on user rights. Once the changes have been made save the case to confirm the changes.
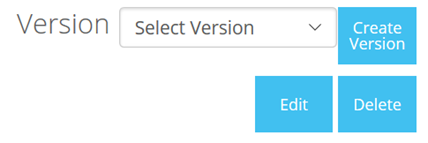
Deleting a Case
If a business case is no longer required it can be deleted by the owner(s) of the business case. To do so click on the Delete button. This will trigger a confirmation message. If Yes is selected the case will be deleted. If No is selected the case will remain as it is.
Assigning Users
Through out the lifecycle of a Business Case there will times users will have to be assigned to specific user roles or you will want to see who the users are on a Business Case. To do this open a Business Case and click on the Management tab and select the Access sub tab.
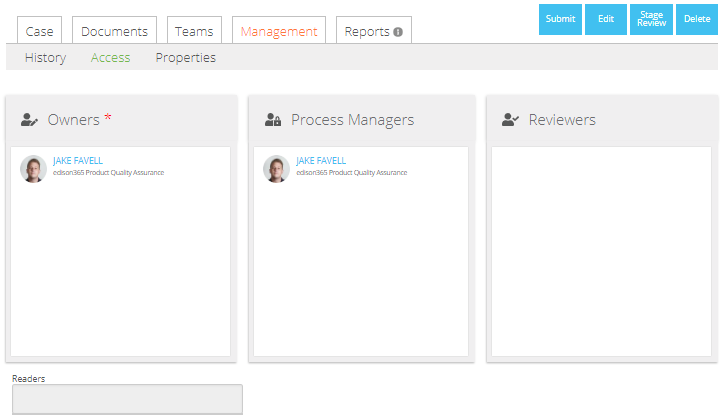
To edit the users assigned click on the Edit button which will display the user controls in a closed manner.

To change the assigned users click on the blue arrow at the end of the roles which will expand them to show the selected users in the white are and the available users in the grey area.
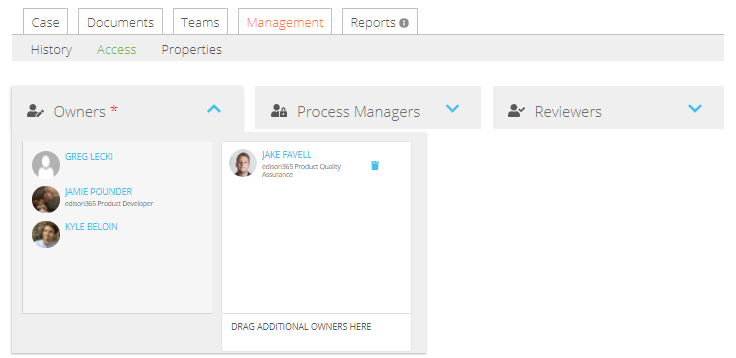
To remove a user click the bin icon next to the user which will remove them as a selected user and move them back to the available users. To add a new user click and hold on the user in the available users and drag them in the 'DRAG ADDITIONAL OWNERS HERE' section. This will change depending on user role being changed.
Once a user is removed from a Business Case this will also impact their ability to view the Business Case.
Reviewing a Business Case
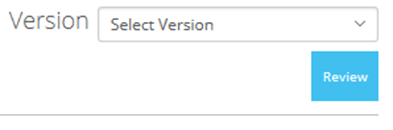
If a Business Case is moved to stage that is set as Under Review the Process Manager will have to ensure Reviewers are assigned. If you are assigned as a Reviewer for a Business Case a Review button will be displayed
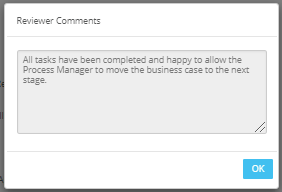
To review a Business Case click the Review button which will display the following dialog

From here you can either Approve or Reject the Business Case stage. Should you wish to Approve the Review you will have to add a tick to each task in the list which will allow the Approve button to be used.
If the stage is to be rejected the Reject button can be clicked at any time without any tasks being selected.
You can also add a comment to support your reasoning in the Comments text field.
Once a decision has been made the decision the reviewer makes will be added next to them in the Reviewers user control:

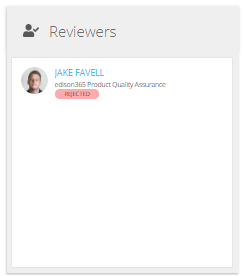
As well this a line will be added to the History of the Business Case to show that the review decision. A speech bubble icon will also be added if a comment is added on the review. If this is clicked a dialog will be opened with the comment by the user.

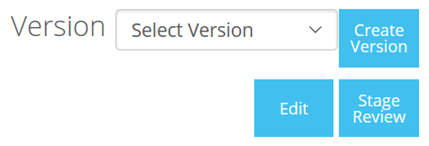
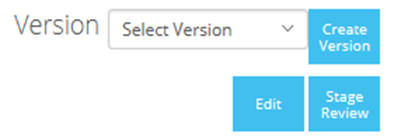
Business Case Versions
Business Cases can have versions created against them. When a version is created it takes a copy of the Business Case form at the time the version is created and saves a version of the data.
To create a version click the Create Version button on the Business Case form.
Once clicked a dialog box will open where you can add a comment to support why a version is being created or what data has been changed, etc.
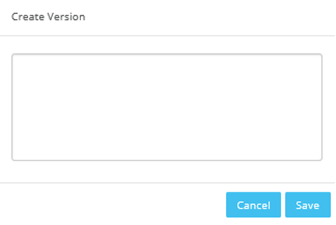
Once the comment has been added click the Save button to create the version.
To view a version for a Business Case click the Select Version drop down. This will open a list of the different versions to select.

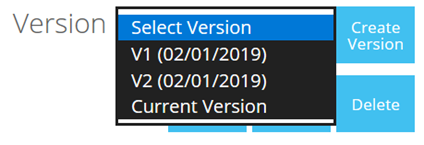
Once the version is selected the data from the Business Case form for the selected version will be displayed
Progressing a Business Case
Once a Process Manager is happy to move a Business Case to the next stage they will have carry out a Stage Review. This is carried out by clicking the Stage Review button from the Business Case page.

This will open a dialog window which will show the current stage of the Business Case, a dropdown of the other stages for the Case Type and a Comments field to add supporting information.
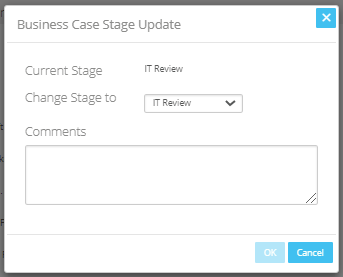
To change the stage click on the drop down next to the Change Stage to text which will display a list of the type stages:

Whichever stage is selected will replace the value in the Change Stage to dropdown. Add an additional comment to support the reasoning for changing the stage and click OK. This will then change the stage to the selected stage from the dialog.
Creating a Project
Some stages of a Business Case can be configured to allow a project to be created from the Business Case. If the stage supports Project Creation a button will be added to the Business Case page

To create a Project click the Create Project button. This will open a dialog window where you can select the Project Type and set the Project name

You can also set if the data from the Business Case tables and fields are also mapped over to the newly created Project.
Please note: if either options are checked the data will only be mapped when the Business Case and Project forms contain the same fields or tables.
Please note: the ability to create a project from a Business Case is only possible if you have a Projects licence when using the edison365 core app. If you are using the legacy edison365businesscase there will be no changes.
Additional Documents
Documents can be included on a Business Case when created or edited after creation. These can be any documents to support the Business Case. To add a document ensure the Business Case is in edit mode and access the documents tab. Clicking on the Documents tab in View mode will display all uploaded documents.

From here click on the Browse button which will open the File Explorer to select any files to upload. This will display the files in the Upload file box.

From here click the Upload button which will add the document(s) in a list.
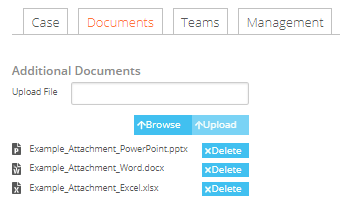
Delete a file click the Delete button next to the file to be deleted. This will open a confirmation message. Once the Yes option is clicked the file will be deleted.
Ensure the Business Case is saved after any changes to ensure they are committed to the Business Case.
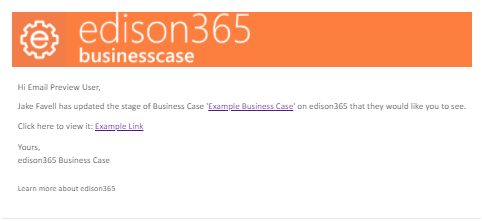
Email Notifications
If an Administrator enables the Email Notifications feature the Business Case module will automatically send emails to users. This will be to provide updates and advise of certain actions requiring their attention. An email will be sent in the following scenarios:
- Business Case creation - To all possible Process Managers.
- New Business Case Owner assigned - To the newly assigned Owner.
- Business Case Review actioned - To the assigned process manager(s).
- Business Case Review completed - To the assigned process manager(s).
- Business Case Reviewer assigned - To the assigned Business Case reviewer(s).
- Business Case Stage changed - To the Business Case Owner(s).
- Business Case Submitted - To all possible Process Managers.
Below is an example of how an email notification will look once received.
Please note should you complete an action in which you carry out a job that causes an email notification to be sent to yourself an email will not be sent. For example if you assign yourself as an Owner.
Teams Integration
Your Business Cases can be linked to Microsoft Teams so the Business Case can be viewed and maintained directly from Microsoft Teams. A Business Case can only be linked if an Administrator has enabled the feature.
When linking a Team to a Business Case you can either create a new Team or associate it to an existing Team.
Please note: This is dependent on how your Administrator has configured the Teams integration. They can either configure it to support creating Teams only, Using existing Teams only, or both options.
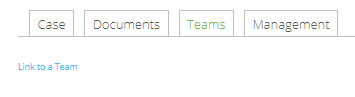
To link a Business Case to a Team the Business Case will need to be in edit mode. Once in edit mode click the Link to a Team text.
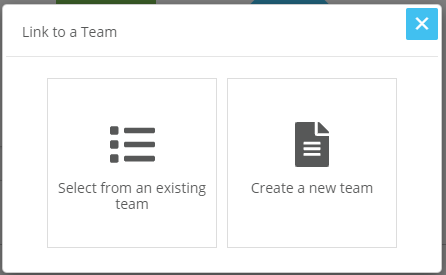
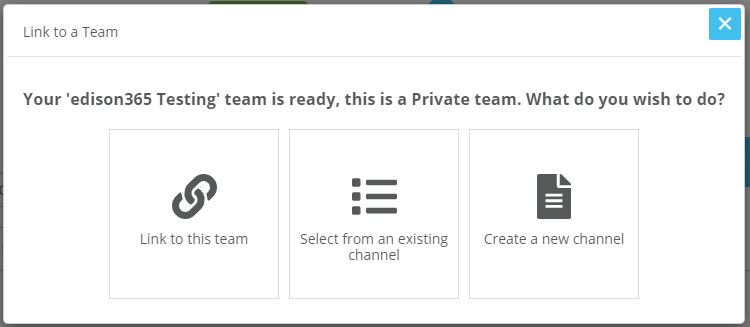
Once in the text is clicked the Link to a Team dialog will appear. From here you can select whether you create a new team or use an existing team.
If you choose to create a new team you will be presented with a form to enter some details for your team. You will need to enter a name (what is displayed on the Teams list), Team email (an email address used to manage the team), Description (additional information about the Team), and Visibility (which Teams users are able to view the Team. If Public all users can see the Team, if Private only members will be able to view it)

Once you have set the Team details click the Create Team button. This will take you to a summary of the Team. Alternatively should you select an existing Team you will also be presented with the below.

Now the Team has been selected the Channel of the Team will need to be decided. A channel can either be created or you can use an existing Channel. Based on how you want the link to be configured make a selection from the following.
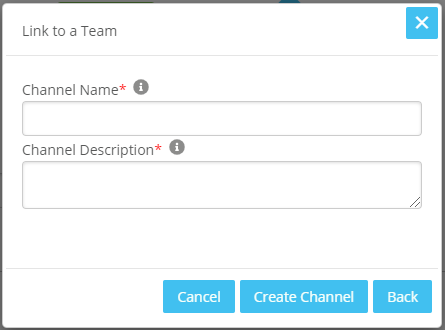
Should a Channel be created you will be presented with a basic form to submit some data for the channel. You will need to enter a Name (Name displayed on the list of channels in the Team), and Description (Some brief information about the Channel). Once entered click the Create Channel button.
Should you wish to use an existing channel select the Select from an existing channel option on the Channel selection. This will display a dropdown field with all existing channels of the Team. To select a Channel click on the dropdown to display the channels. When the desired channel is selected click the Select Channel.

The final step is to determine the tab in which the Business Case will be displayed in. You can either select an existing tab or create a new tab.

If you want to use an existing tab select the Select from an existing channel tab option. This will display a dropdown field of the current tabs for the Channel.

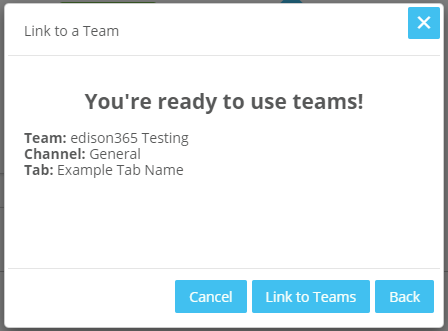
Should you wish to create a tab select the Create a New Tab option. This will display a textbox field where you can enter the name of the tab how it is displayed in the Teams Channel. Once the Name is entered click the Create Tab button. Now the tab is defined you will be displayed with a summary of the link. Including the Team Name, Channel, and Tab. Click Link to Teams to complete the link
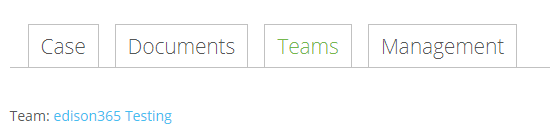
Once the Team link has been established there will be a link on the Business Case page to show the Team it is linked to. To open the link click on the link which will open Microsoft Teams and load up the Business Case.
Read Only Access
A user who is not assigned a role to a Business Case or even a Business Case type can be assigned as a reader. This can be assigned by the Case Owner or Manager as well as the Admin.
If a user is assigned as a reader the Business Case will be added to the designated users Home, Discover, and Personal pages in the relevant carousels. Once the user accesses the Business Case they will have no authority to edit or manage the Business Case and can only view all of the data.
This can be set in the Management tab and the Access sub tab when in edit mode.

Simply add the name of the user who requires read access to the Readers field which will search for users based on the criteria used. Once the user is selected their name will be added to the field. Once all readers are assigned ensure the Business Case is saved.
Last Updated: 30 June 2021