Issues don't always need to be thorny... follow the below steps to log them with ease ✌️
On this Page 📑
Keep on track with a standard table ✔️
A standard table will make your issues easy to log and understand.
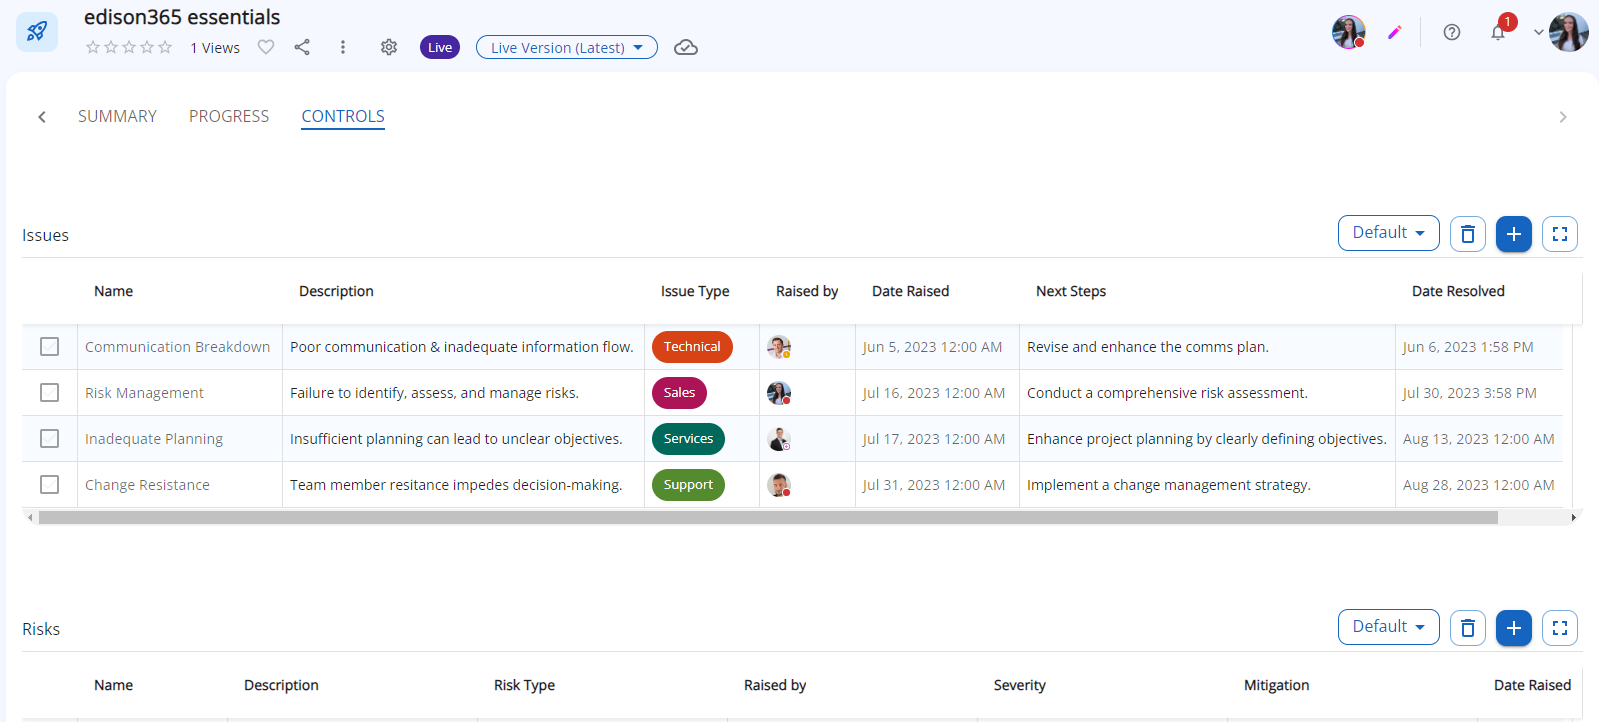
Without juggling several views, a simple grid makes it easy to enter and read data!
How to build this 🧐
We used a Standard Table, no fancy settings, just one grid containing:
- Name- Text field, for a short and snappy title.
- Description- Rich text, allowing for plenty of detail.
- Issue Type- Single choice, letting us identify common themes in our issues.
- Raised by- People and Groups, to identify the person who notes the issue, even letting us see if they are available to chat about it right now!
- Date Raised- Date and Time, record the exact time this issue was noted.
- Next Steps- Rich text, add methods for resolving the issue.
- Date Resolved- Date and Time, have complete visibility over time taken to resolve an issue, right down to the exact minute.
How this could be improved 🤔
- Add a Single Choice field for Severity or Impact, to highlight serious issues.
- Add a second view! Create an Issue Status field containing options, Open, Closed-Resolved etc. and use is to add a Board View for a quick overview of Issue Status.
- Configure an Escalated To column using a People and Groups field, to tag important users.
The steps to success ⭐
The things you need to take to build an Issues Log like us:
- Configure your Fields
- Administration
- Fields tile
- Create
- Save
- Build your table
- Administration
- Table tile
- Create
- Select your fields- reorder as necessary
- Create a Grid View in View Settings
- Save
- Add to your Form
- Add Form to Workflow
- Done
Further reading 📖
To learn even more about how to create a Risk Table that works for you, please refer to our Admin Guides.