Forget the elixir of life 🧪 come and discover the default elements of the Schedule table 📅
Contents:
Overview 💡
Welcome to the edison365 Schedule Table! With a teeny-tiny 36 system fields attached to every task, we empathize with feelings of intimidation and queasiness.
But fear not, by understanding the basic components of this table, you can leverage it's power and make it work for you. Ultimately, saving you time and effort!
This guide will take you through the elements that are automatically included in every task table, setting you up to start bending the Schedule Table to your will 😀
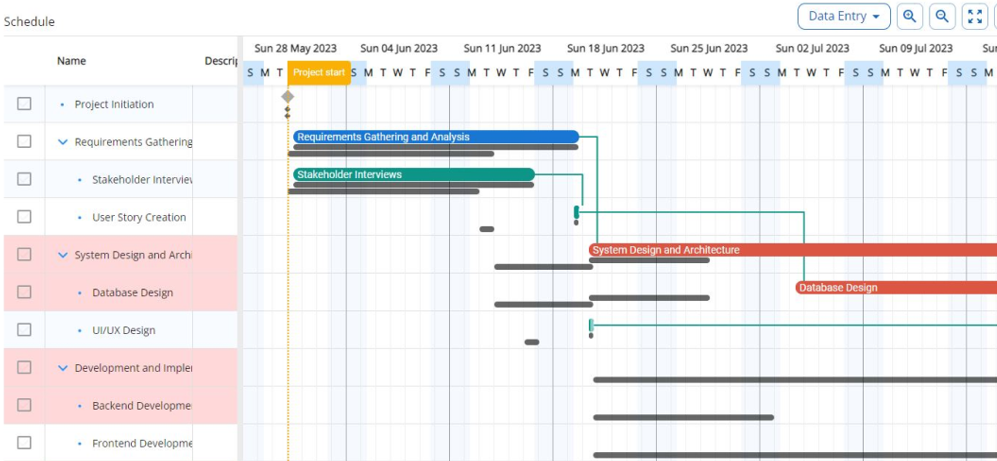
Below, we have broken the schedule down into it's main themes and listed out it's component columns.
When starting out, we recommend you pick and choose a few elements that are most relevant to you, this tool can be powerful without utilizing every single field ❣️
Basic Details & Scheduling ✅
The bare bones of project management, these fields form the most basic columns of any task table. They don't require much explanation, but let us elaborate:
- Name- free text box for typing the task name.
- Description- text box for adding more details on the task.
- Start Date- date task will commence.
- End Date- date task will finish.
- Unique ID- automatically generated code assigned to the task.
- Percent Done- proportion of task already completed.
- Duration- numeric field, how long task takes to complete. Add a number and desired unit here, milliseconds, seconds, minutes, hours, days, months or years.
- Duration Unit- a read only column showing the measurement of duration.
Super-charged Scheduling 🚀
Inputting your tasks with simple scheduling is a fabulous start, however, we have some tricks up our sleeve for advance scheduling. Here are our super scheduling columns:
- Sub Tasks- Sub tasks are your tasks babies, the details of sub tasks, such as duration and effort, will roll up to form the details of the parent. To add sub tasks, select task, right click, indent. Creating sub tasks will populate the Parent Unique ID field.
- Deadline Date- The date inserted here is the date this task must be complete by. It does not affect the other schedule elements, but reminds users of deadlines, justifying a stern "telling off" if missed!
- Early Start/ End Date- These read only column is calculated to show the earliest possible date this task could begin or finish. The dates are calculated based on the earliest/ latest dates of linked tasks due to take place before this one and this tasks own constraints.
- Late Start/ End Date- These read only values show us the latest possible date this task could begin or finish, whilst staying in line with the rest of the project. The dates are calculated based on upcoming tasks and this tasks own constraints.
- Inactive- Like freezing a lost credit card, checking this box will exclude the task from the project until you uncheck it. When inactive, a task won't affect it's linked tasks, assigned resources allocation or completion rate of the whole project.
- Manually Scheduled- Ticking this box will make this task independent of it's links to other tasks. When manually scheduled, the start date will not change unless edited individually, it will not be affected by changes to it's dependencies or constraints.
- Scheduling Mode- The duration of your task can be provided by you, or calculated automatically depending on a few elements. The options are:
- Normal- Task will be scheduled based on start/ end date and project calendar. In this mode, duration is also affected by calendars of assigned resources, if there are any.
- Fixed Duration- This mode calculates the effort required to complete the task based on it's duration and the resources allocated. If we increase the number of resources assigned to a task with duration of 2 days, the effort required to complete the task will automatically increase.
- Fixed Effort- Manually input the effort required to complete the task, automatically calculate the duration. The more resources you assign to a task, the effort will remain the same, but the duration will shorten.
- Fixed Units- Use this mode when the number of resources assigned to a task is fixed. Manually input the resources and the effort and duration of the task will be automatically calculated. Unless the Effort Driven column is checked, in which case, only duration will be recalculated.
- WBS- A number automatically assigned based on the order and sub-category of the task.
- Unscheduled- This magic box checks itself when crucial task information has not been inputted, either start date, end date, or duration. To uncheck the box, simply enter the missing info. Manually updating this box won't work, so don't cut corners!
- Scheduling Direction- Set via the ⚙️ we can choose to schedule forwards (starting as soon as possible) or backwards (finishing as late as possible). All sub-tasks and successors will inherit the direction of their parent or predecessor.
Dependencies 🔀
Lean on me! Dependencies are the critical links between activities, showing the order work should be completed and the relationships between tasks. Editing the dates of a linked task will change the dates of it's dependents.
- Setting them up- In the timeline, draw links between tasks. In the grid, highlight multiple tasks, right click, Add or Remove Dependencies.
- Types of links:
- Finish- to- Start- The most common dependency, you can't eat dinner until you've cooked it.
- Start- to- Start- Your family can't start eating until you've started eating too (well they could, but it's rude).
- Finish- to- Finish- Everyone should finish eating at the same time, or you'll all be waiting around.
- Start- to- Finish- You need to start making room in the dishwasher, before you can finish clearing the table.
Milestones 🎉
A milestone is a notable achievement in your schedule. Milestones are like schedule highlights, crucial points that mark serious progress. It's a point where you mark your accomplishments, you could also do a dance, if that way inclined.
To manage milestones in a schedule table:
- Is Milestone- Check this box to turn a task into a milestone, this will reduce the duration to 0. Equally, set a task duration as 0 to check this box and create a milestone. Or right click on the task and Convert to Milestone.
Baselines 🚩
Baselines are like the blueprints of your project, the secret power source that keeps everything on track. Baselines map out the schedule your project must stick to, in order to get things done on time. If you slip up, you'll be able to use your baseline to compare when things should have been done vs when they actually happened!
To build your baselines:
- Add tasks to your table.
- Select the ⚙️ at the top right of your Schedule table.
- Expand Show Baselines option> Add Baseline.
- This creates a baseline dated with todays date, you can hide this baseline or all baselines from your schedule by unchecking the boxes in this section.
Constraints ⌛
Schedule constraints are conditions we apply to the timing of our tasks. For example, taking your first driving lesson!? This task must start no earlier than the birthday you become of age. Passing your driving test!? This task must finish no later than the day you move to Mars, you can't take your driving test on Mars, sorry.
To set up constraints:
- Constraint Date- The day that impacts this tasks.
- Constraint Type- Why this date is important, we have several options:
- Must start on
- Must finish on
- Start no earlier than
- Start no later than
- Finish no earlier than
- Finish no later than
Critical Path 🚨
The critical path is a sequence of your most influential tasks, a delay to any of them will impact the completion date of your project. Whilst projects can spawn many tasks and tendrils, take great care with activities in the critical path, there is no room for maneuver with these tasks.
How to master critical paths:
- Critical paths are automatically generated from activities that have decencies with the task that finishes last. To add an item to your path, draw a link on the timeline between this task and any task leading to the final day of the project. It will turn red once added!
- To hide a path, click the ⚙️ at the top right of the table and uncheck Show Critical Paths.
Slack ⌚
Slack refers to the amount of time a task can be delayed without affecting the overall project schedule and finish date. Calculating slack gives us a bit of flexibility on the completion date of tasks that are less time-sensitive. So we don't promote dossing, time wasting or thumb twiddling, but we do support slack!
Columns involved in slack:
- Total Slack- The amount of working time the task can be set back without causing delay to the project end. This column is automatically calculated based on the rest of your schedule.
- Slack Unit- A read only field that shows the measurement of slack, e.g. days.
Resource 🧍
Simply put, resource refers to who completes the work, what their working patterns are and how much availability they have. Check out our Resource Management guides to learn more on the topic.
As a step in your resource management journey, look into these columns:
- Assigned Resource- A multiple choice drop down, allowing you to select resources from your pre-made list. Use the Units columns of the drop down to define the % of the work each resource is needed for.
- Ignore Resource Calendar- If unchecked this task will be scheduled in line with the resources working pattern. If checked, this task will not take the resources calendar into account, it will schedule the task to follow the task or project calendar, see below!
Calendars 📆
Calendars are mystic balls with full knowledge of the hours we work, the days we work, weekends and holiday time! There are different tiers of timetables, the resources calendar (see above), the task calendar and the project calendar. Before you carry on, make sure you have created your calendars!
Let us explain the columns involved:
- Calendar- The calendar relating to this task. Choose from the drop down of pre-made options, and allow the table to calculate the task end date. If left blank, the task will scheduled based on the resources calendar. Or, if set to Ignore Resource Calendar, it will schedule using the project calendar.
- Effective Calendar- The calendar relating to the overall project. To populate this column, select the 📅 at the top right of the table and choose a Task Table Calendar.
Effort 💪
It takes 12 minutes to cook a tasty pizza, but only 30 seconds to put in the oven! That's how we see duration vs effort. Whilst a task could take a long time to complete, the involvement required from resources could be minimal. Effort plotted in a task table contributes towards resources overall allocation.
Consider these related columns:
- Effort- Type required effort and unit here, in milliseconds, seconds, minutes, hours, days, months or years.
- Effort Unit- Reflects measurement of effort, read only column.
- Effort Driven- When using the Fixed Unit Scheduling Mode, if Effort Driven is checked, the duration of the task will be automatically calculated and effort will remain fixed. If unchecked, effort will be calculated automatically.
Further Reading 👓
Become a Resource Management boss